Crown Molding: Sizes, Types, Angles and Cost
 Matúš Koleják
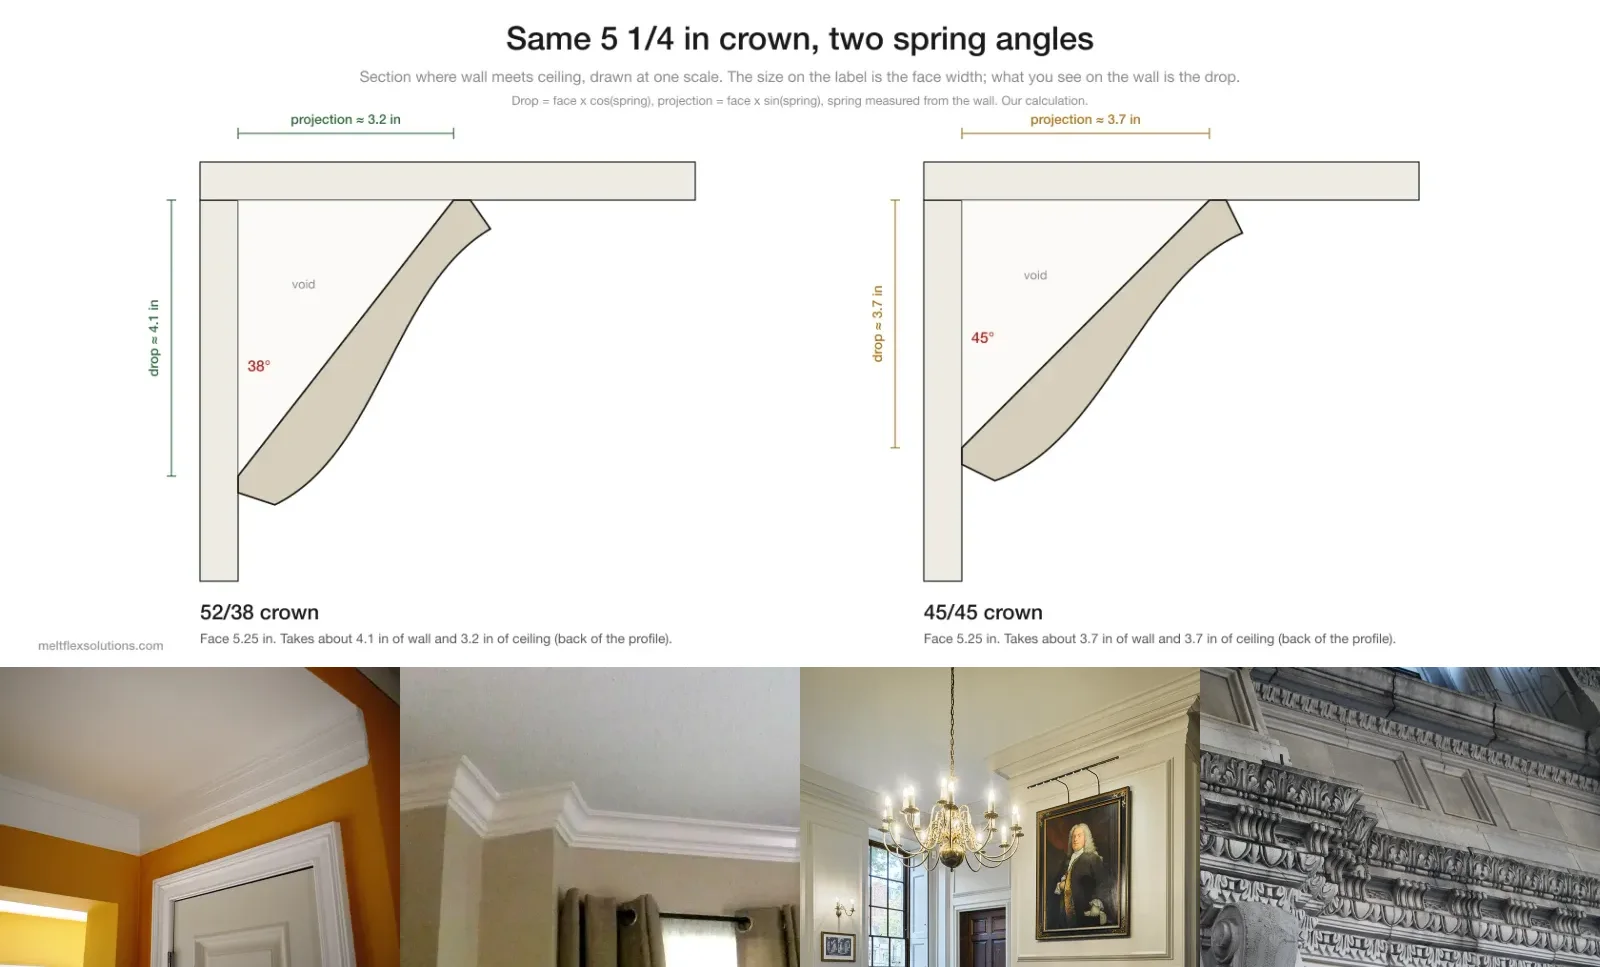
The same crown takes a different amount of wall depending on its spring angle. Drawing by MeltFlex, photographs credited below.
Most crown molding pages either sell it or show galleries of it. The questions people actually get stuck on are narrower: which size, why the number on the label is not what you see on the wall, what angle to set the saw to, and why a perfect miter still opens up. We drew the geometry at scale, worked out the cutting angles from the standard formulas, checked sizes and prices against Angi’s 2026 guides, and took the installation details from a remodeler writing in the Journal of Light Construction. The photographs are real jobs by the carpenters and photographers credited under each one.
The short version
- Size: Angi’s rule is to start at 2 1/2 in for an 8 ft ceiling and add about an inch per extra foot. In our view 3 1/2 to 5 1/4 in suits most 8 ft rooms.
- The label is the face, not the drop. A 5 1/4 in crown at 38° covers only about 4 in of wall.
- Angles: know your spring angle (38° or 45°) before you cut. The table below covers square corners, bay windows and walls a few degrees out.
- Inside corners: cope them rather than mitering both pieces. A corner 2° out of square already throws a miter off.
- Trusses: in a truss-framed house, fasten crown to the ceiling, not the wall, or it will open a gap in winter.
What is crown molding?
Wikipedia defines crown molding as a cornice of decorative molding installed where an interior wall meets the ceiling, and also over doors, windows and cabinets. It was historically plaster or wood; today it is also MDF, polyurethane, PVC and polystyrene foam. It can be a single piece or several pieces built up into one larger cornice.
The name and the shape come from classical architecture. The crown at the top of a room plays the part of the cornice, the projecting top band of a classical building’s entablature. Indoors it does a humbler job: it covers the joint between wall and ceiling and gives the room a finished top edge.

Photograph. A stone cornice, the exterior ancestor of indoor crown. Project: Crown Moulding Appreciation by elle morris on Behance.
Molding or moulding? Same thing. Molding is the American spelling, moulding British and Commonwealth.
Spring angle: why the size on the label is not what you see
Crown does not sit flat on the wall. It leans out across the corner at an angle, leaving a triangular void behind it, and that angle is the spring angle. Wikipedia notes it is typically sold in 45° and 38° formats; 38° crown is often labelled 52/38 because its back makes 52° with the ceiling and 38° with the wall.
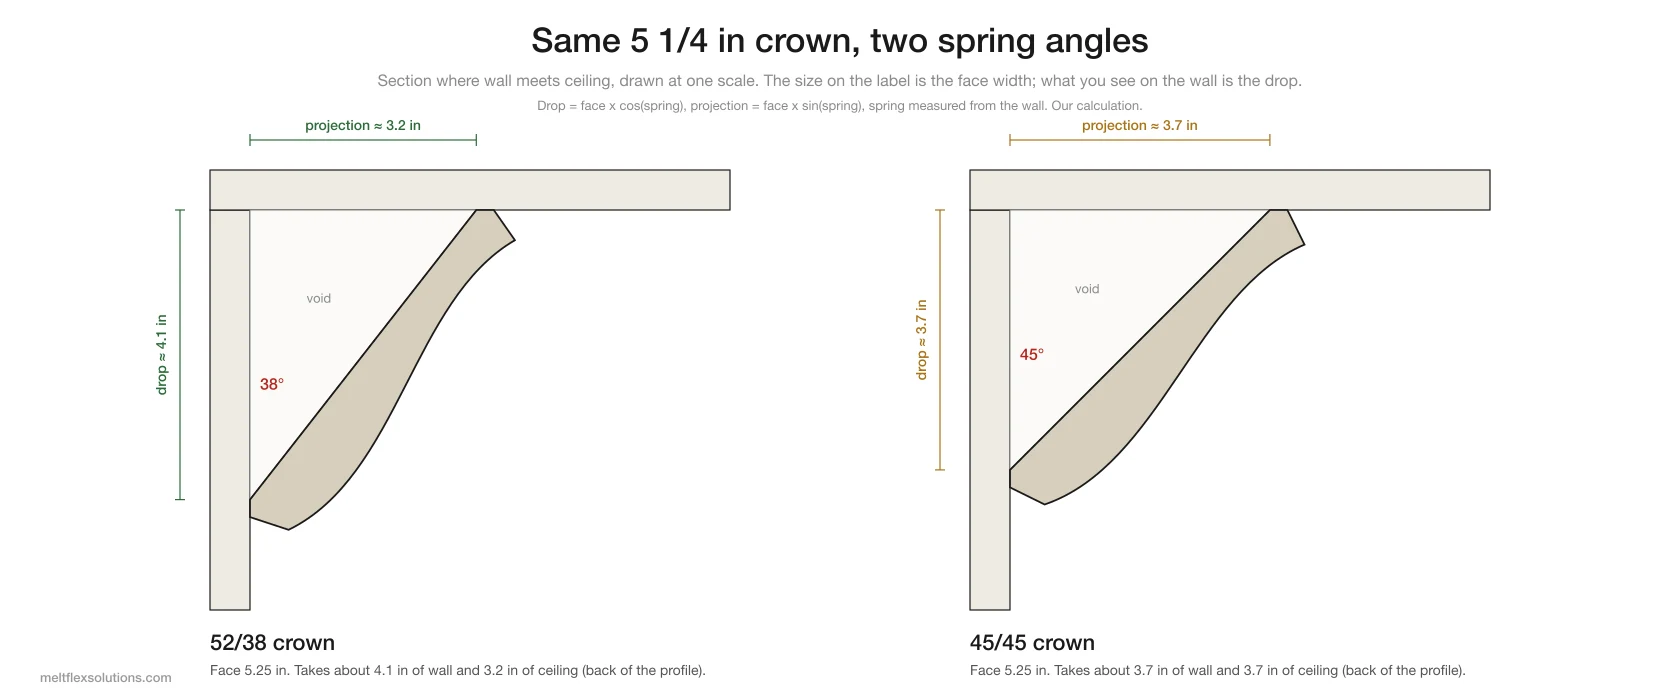
The face width is what the label says. The drop is what you see on the wall. Drawn by MeltFlex.
That matters for two reasons.
Size. Retailers and Angi quote the face width, measured from the lower edge to the upper edge. What you see on the wall is the drop, which is shorter. From the geometry, drop is about face × cos(spring angle) and projection is about face × sin(spring angle):
| Face width | 52/38: drop on wall | 52/38: projection on ceiling | 45/45: drop and projection |
|---|---|---|---|
| 3 1/4 in | 2.6 in | 2.0 in | 2.3 in |
| 4 1/4 in | 3.4 in | 2.6 in | 3.0 in |
| 5 1/4 in | 4.1 in | 3.2 in | 3.7 in |
| 6 5/8 in | 5.2 in | 4.1 in | 4.7 in |
Our calculation from the profile’s back, ignoring the small flats at each edge. Check the drop and projection on the manufacturer’s sheet for the exact profile you buy.
Cutting. The miter and bevel settings depend on the spring angle. Using the 45° numbers on 38° crown is one of the most common reasons a corner will not close.
How to tell which one you have. Look on the label or spec sheet first. If there is none, sit the crown in the corner of a framing square the way it will sit on the wall and ceiling, and measure how far down the wall leg and along the ceiling leg it touches: equal means 45/45; noticeably more on the wall means 52/38.
What size crown molding for your ceiling?
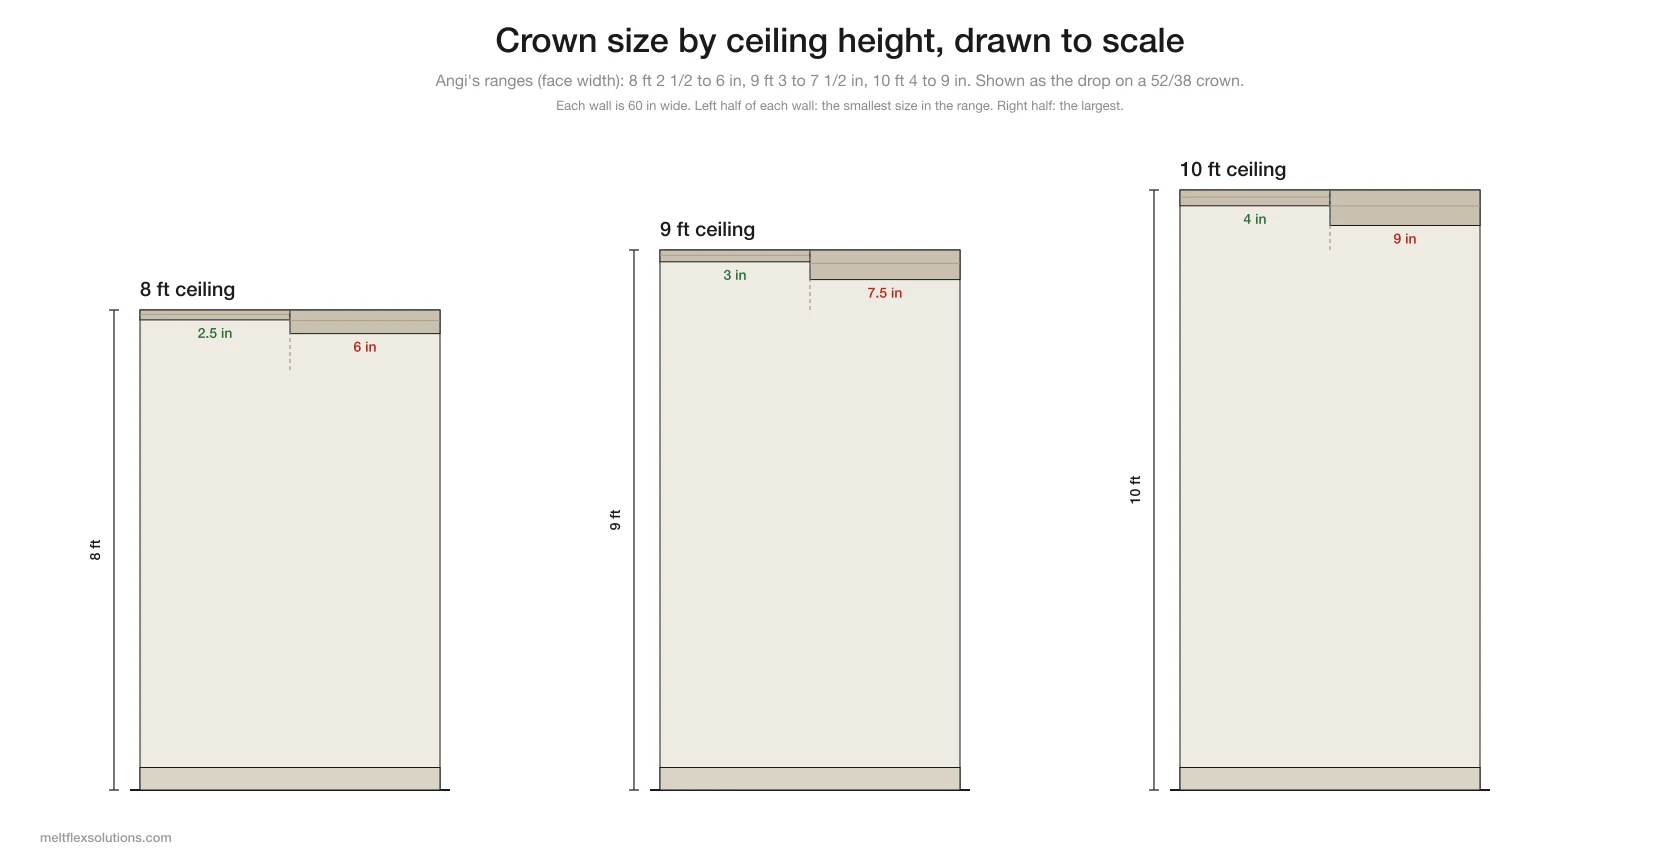
Angi’s ranges drawn as they would actually appear, to scale. Drawn by MeltFlex.
Angi’s crown molding size guide, updated July 2026, gives these ranges for the face width:
| Ceiling height | Crown size (face width) | Typical cost per linear foot, installed |
|---|---|---|
| 8 ft | 2 1/2 to 6 in | $3 to $25 |
| 9 ft | 3 to 7 1/2 in | $4 to $30 |
| 10 ft | 4 to 9 in | $6 to $35 |
| 12 ft and up | 6 to 12 in and more | $7 to $50 |
Sizes from Angi’s size guide; prices per linear foot from Angi’s crown molding cost guide, updated September 2026.
Angi’s own shorthand is to start at 2 1/2 inches for an 8 ft ceiling and add about an inch for every extra foot, and to go bigger in formal rooms and smaller in bedrooms and studies: 2 1/2 to 3 1/2 inches for a bedroom with standard ceilings, 4 to 6 for a formal dining room.
Two cautions about that guide, because it contradicts itself in places. It describes 8 feet as the standard ceiling height in one sentence and “8 inches” in another, which is a typo. And for 10 ft ceilings its table says 4 to 9 inches, while the text says formal rooms at that height should have crown of at least 9 inches. We have used the table.
What we would do (our opinion). The drawing shows why the ranges are wider than they look: even the largest crown Angi suggests for an 8 ft room takes under 5 inches of a 96 inch wall. Undersized crown is the more common mistake than oversized. Two checks settle it on the real wall: tape a strip of paper the height of the drop along the top of the wall and look at it from the doorway, and compare it with your baseboard and door casing, because crown that is much slimmer than the casing below it reads as an afterthought.
Six profiles, and what the catalog names mean
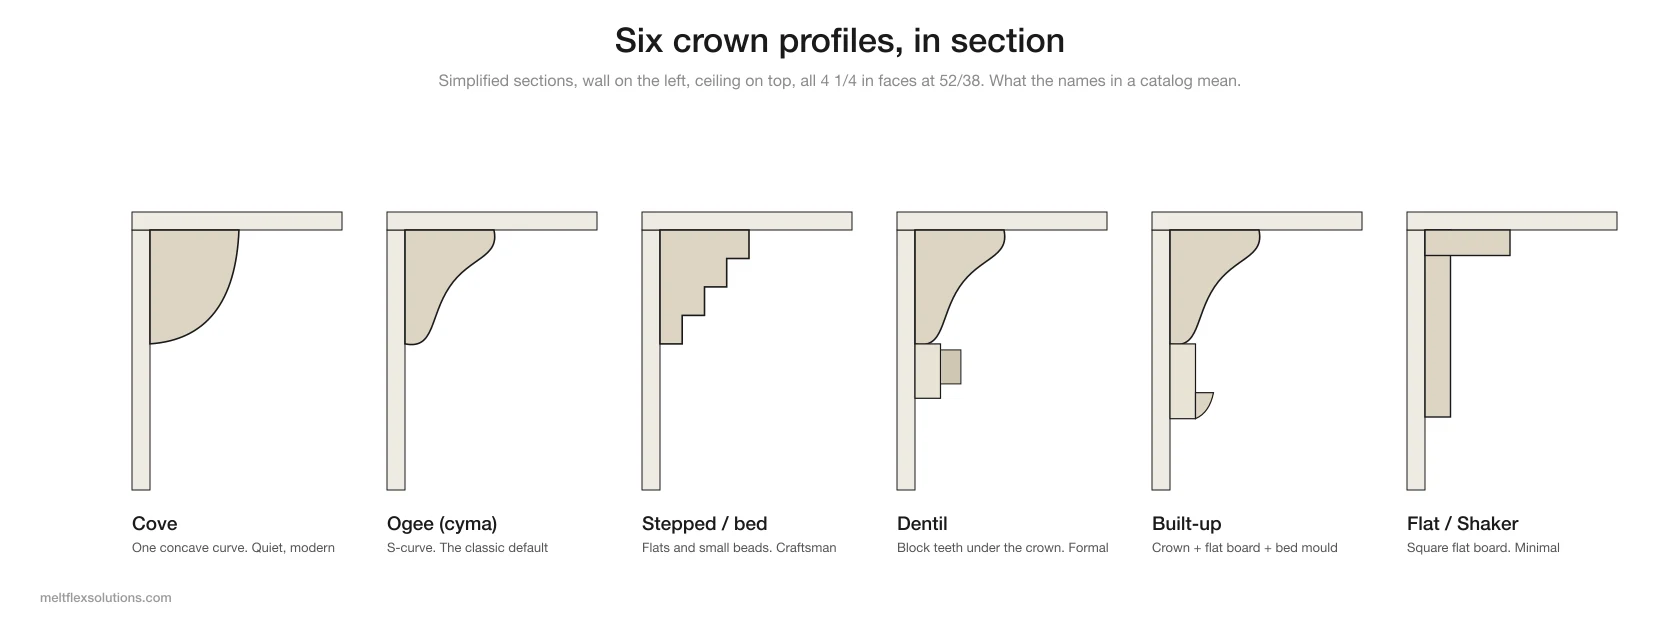
Simplified sections of the six families you will see in catalogs. Drawn by MeltFlex.
- Cove. A single concave curve. The plainest crown, and the one that suits modern and minimal rooms.
- Ogee (cyma). An S-curve, concave and convex. The default traditional crown and the one most stock profiles are built on.
- Stepped or bed molding. Small flats and beads in steps. Common in Craftsman and Arts and Crafts interiors, and used as the lower piece of built-up crown.
- Dentil. A row of small blocks, like teeth, under the main profile. Formal and Georgian; it needs a room tall enough to carry the detail.
- Built-up. Several stock pieces combined: typically a flat board on the wall, the crown, and a bed molding. This is how large crown is made affordably, and it is also the detail that solves truss uplift (below).
- Flat or Shaker. A square-edged flat board, sometimes with a small step. Reads as modern crown and suits Shaker cabinets and simple casings.
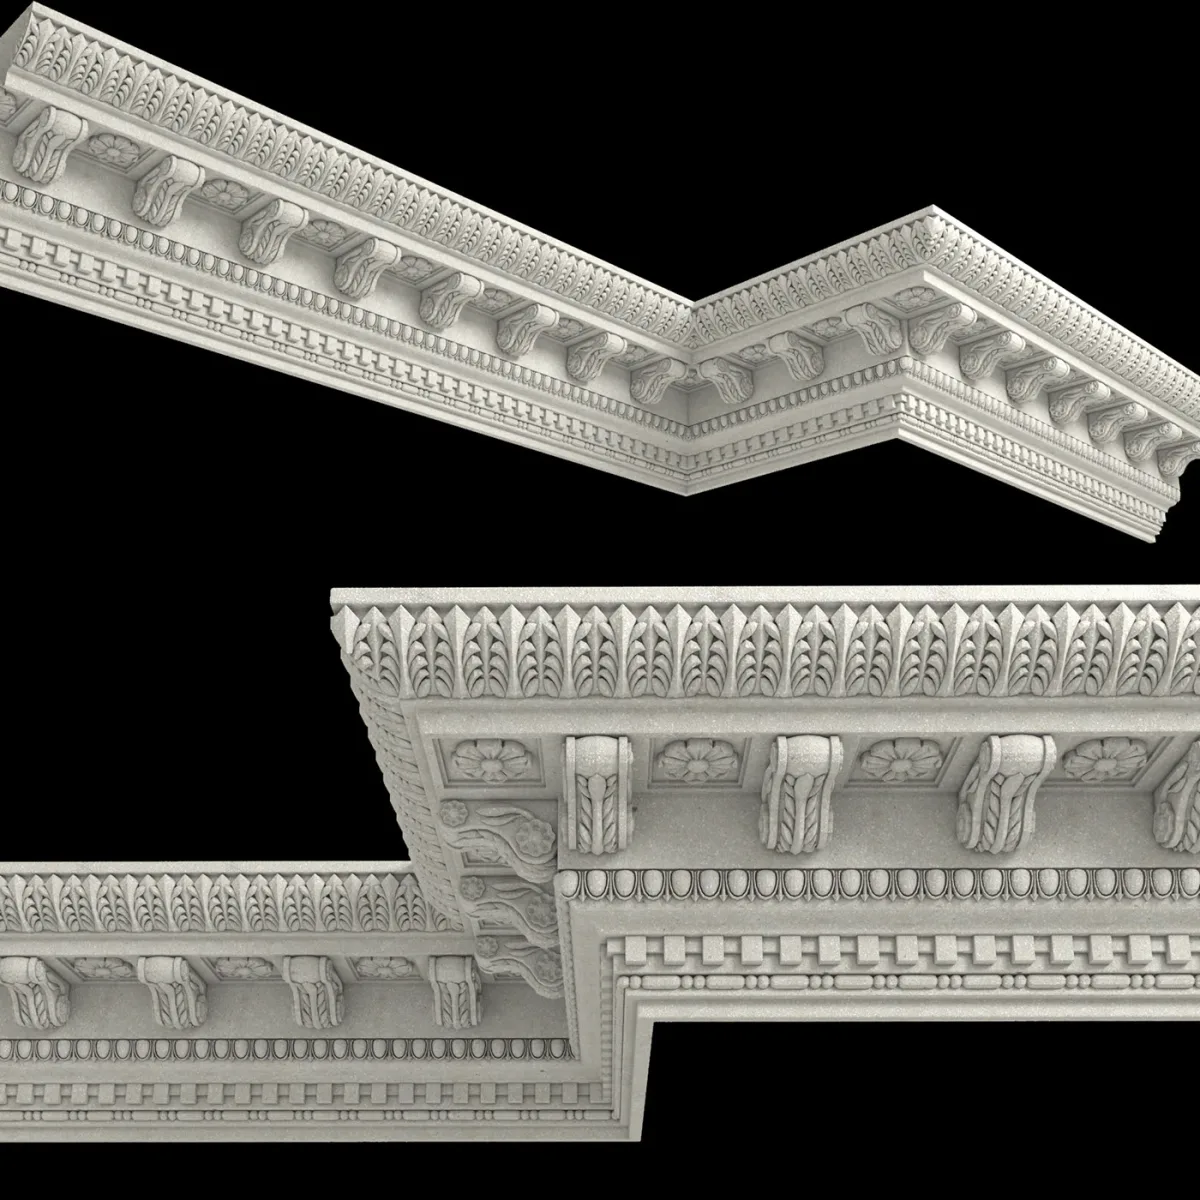
3D render. A dentil crown turning inside and outside corners. Project: Decor molding 3 by elvin hamidov on Behance.
Materials and cost
Angi’s cost guide, updated September 2026 and based on 1,425 verified projects, puts the national average for installed crown molding at $1,303. Most people pay $609 to $2,126, with a low of $200 and a high of $4,500. Installed, it runs $4 to $23 per linear foot, and labor is usually half the cost or more.
| Material | Cost per linear foot (Angi, 2026) | Good for | Watch out for |
|---|---|---|---|
| MDF | $1 to $7 | Painted crown in dry rooms | Swells in humid rooms |
| PVC | $1 to $4 | Bathrooms, kitchens | Angi says it is usually only sold in white |
| Polystyrene foam | $1 to $4 (installed) | DIY, glued up | Limited detail (Angi) |
| Polyurethane | $2 to $10 | Ornate profiles, light weight | Dents fairly easily (Angi) |
| Solid wood | $3 to $30 | Stained crown, period rooms | Moves with humidity, hardest to cut |
| Plaster (premade) | $6 to $20 | Restoration, ornate cornices | Needs a skilled installer |
| Metal | $10 to $30 (installed) | Modern and commercial | Specialist |
Material prices exclude installation unless marked. Restoring existing run-in-place plaster cornice is a different job: Angi quotes $4,000 to $6,000 even for a couple of linear feet.
A worked example. A 12 by 14 ft room has 52 linear feet of wall at the ceiling. Angi’s per-foot range of $4 to $23 installed puts it at roughly $210 to $1,200. Buying the material yourself, Angi suggests adding 15 to 20% for cutting mistakes, so about 60 to 63 feet of stock, which in 8 and 12 ft lengths means planning where the joins fall before you buy. Painting adds $1 to $3.50 per linear foot if you pay for it.
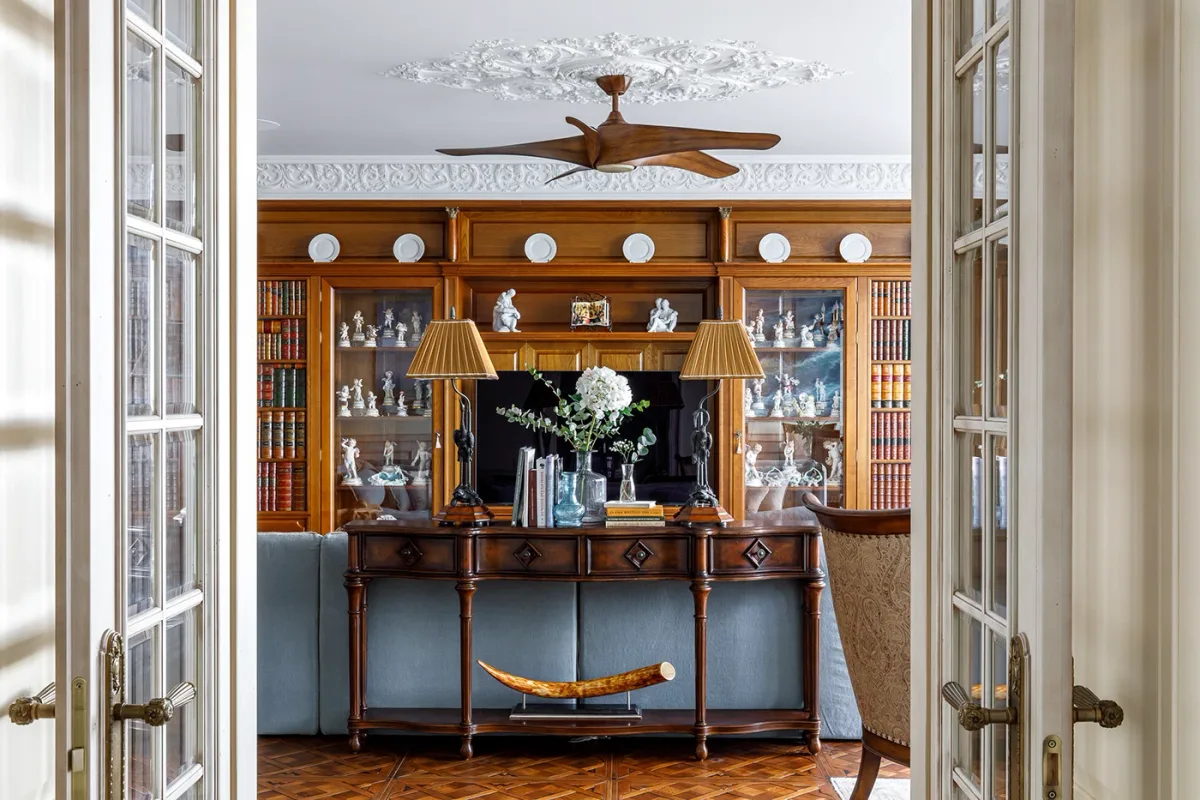
Photograph. Plaster cornice and a ceiling rose. Project: Aurora plaster moulding in Natalia Konstantinova’s project by Studio Aurora on Behance.
How to cut crown molding: the angle table
Wikipedia gives the standard formulas for cutting crown lying flat on a compound miter saw, where the two variables are the spring angle and the angle of the wall corner:
- Miter = arctan( sin(spring) / tan(wall angle / 2) )
- Bevel = arcsin( cos(spring) × cos(wall angle / 2) )
We ran them for the corners you actually meet. The 90° row matches the crown detents marked on most compound miter saws, which is a useful check that the table is right.
| Wall corner | 38° crown (52/38): miter | 38° crown: bevel | 45° crown: miter | 45° crown: bevel |
|---|---|---|---|---|
| 90°, a square corner | 31.6° | 33.9° | 35.3° | 30.0° |
| 88°, slightly tight | 32.5° | 34.5° | 36.2° | 30.6° |
| 92°, slightly open | 30.7° | 33.2° | 34.3° | 29.4° |
| 100° | 27.3° | 30.4° | 30.7° | 27.0° |
| 120°, hexagonal bay | 19.6° | 23.2° | 22.2° | 20.7° |
| 135°, a 45° bay window | 14.3° | 17.6° | 16.3° | 15.7° |
Our calculation from the formulas above. Wall corner is the angle measured across the corner on the room side; measure it with an angle finder rather than assuming 90°.
Look at the 88° and 92° rows. A corner only 2° out of square moves the miter by about 0.9° and the bevel by about 0.6°, which is enough to open a visible gap at the long point if you cut for 90°. Measure the corner with an angle finder instead of assuming it is square; where it varies along its height or you cannot measure it, that is the practical case for coping.
Coping inside corners. Wikipedia describes the method: cut a simple miter on the end that meets the corner, then use a coping saw to back-cut along the profile line, so the end of that piece follows the face of the piece it butts into. The first piece runs square into the corner; the coped piece sits over its profile. A cope still closes when the corner is 88° or 92°, which a pair of miters will not. Outside corners are mitered, and are the ones to glue.
Cutting nested instead of flat. Many carpenters skip the bevel entirely by standing the crown in the saw “upside down and backwards”: the ceiling edge down on the saw table, the wall edge against the fence, at its spring angle, and then cutting a plain miter (45° for a square corner). It is simpler on a saw without a bevel, but the crown has to be held at exactly its spring angle; a stop block clamped to the table helps.
Corner blocks. Wikipedia also notes the shortcut: manufactured corner blocks at every corner, so each length only needs a square cut. They change the look, and suit cottage and Victorian rooms better than plain modern ones.
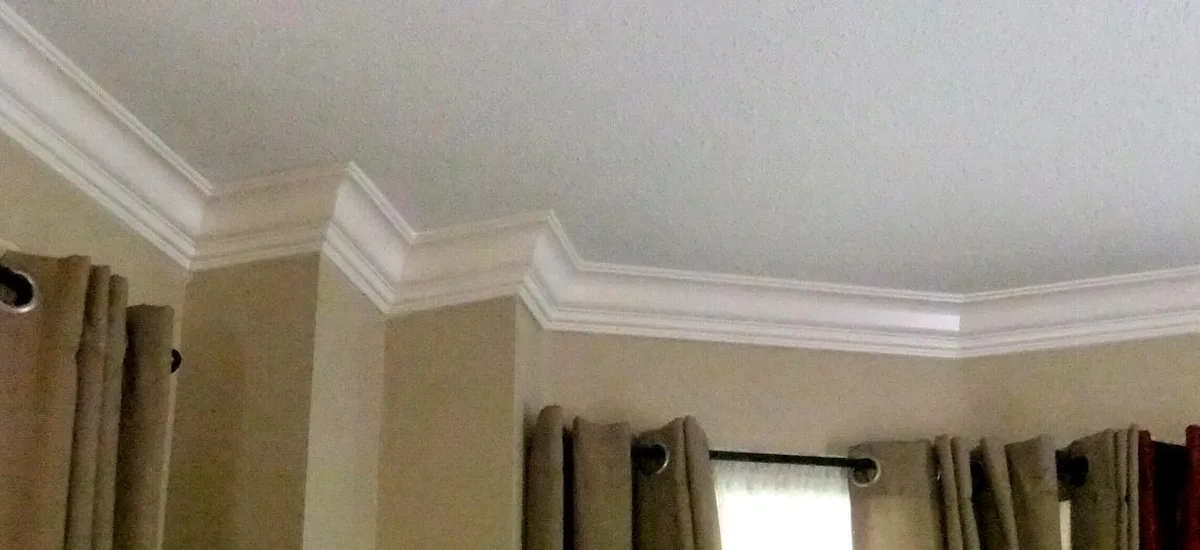
Photograph. Crown turning a bump-out: two outside miters and two inside corners in a short run. Project: Crown Moulding & Wainscotting Job by Michael Lewis on Behance.
The gap that opens every winter: truss uplift
In houses framed with roof trusses, the ceiling can lift away from the tops of interior walls with the seasons, a movement called truss uplift. JLC describes ceilings that move seasonally by up to an inch or more. Crown fixed to the wall moves with the wall, so a crack or gap opens along the ceiling.
Chuck Green, a NARI-certified remodeler, set out the fix in the Journal of Light Construction. The aim, he writes, is not to resist the movement but to hide it:
- Nail a flat trim board to the wall.
- Fasten a triangular nailing base to the ceiling only, with a second flat board attached to its back.
- Nail the crown to that base, using longer nails at the top and very short brads at the bottom.
- Prefinish every piece except the nailing base, so no unpainted line shows when the two flat boards slide past each other.
Because the assembly hangs from the ceiling, the ceiling can move up and down and the two flat boards slide over each other instead of opening a gap. Where a ceiling moves an inch or more, he notes, the detail needs scaling up. If your crown cracks at the same corners every winter, this is very likely why, and caulk will not fix it.
Ideas: where crown changes the room most
Above door and window casings. Crown and casing meeting in a clean line is most of what makes trim look intentional. Keep the gap between the bottom of the crown and the top of the casing consistent around the room, or close it entirely.
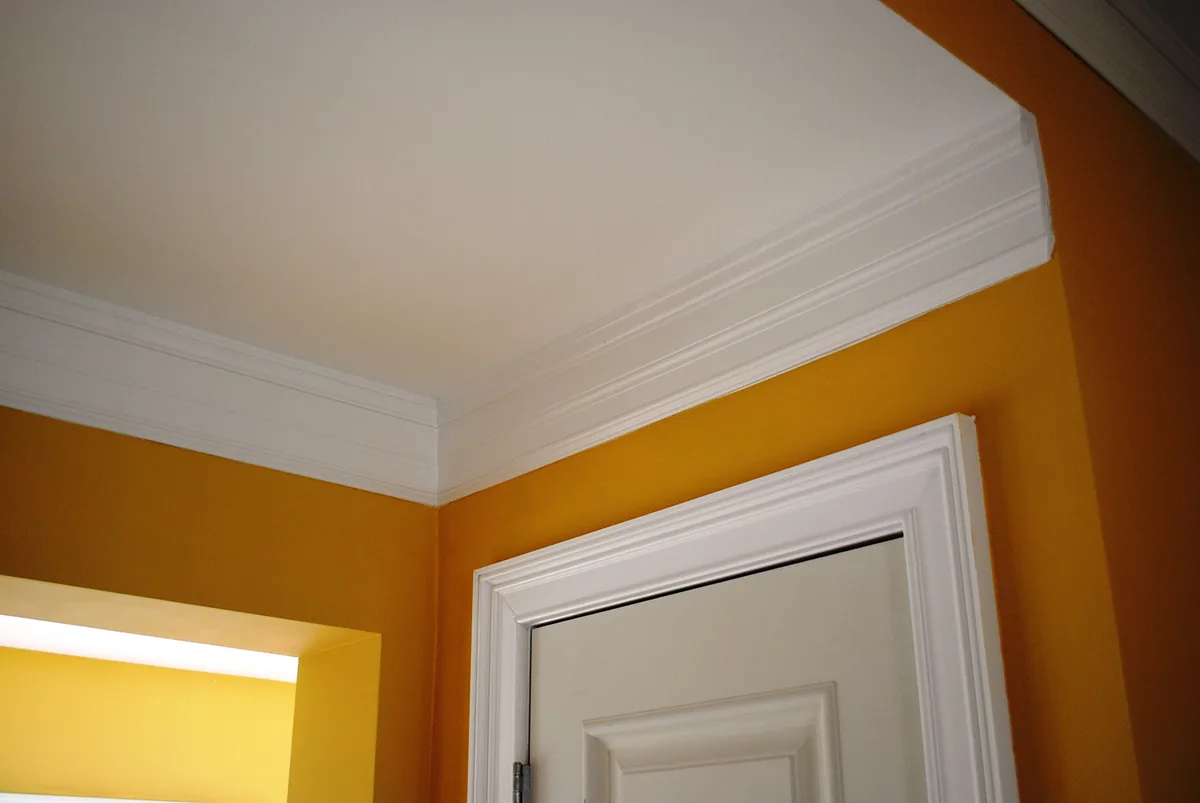
Photograph. White crown and casing against a saturated wall. Project: Moulding by Tim Pacelli on Behance.
On tray ceilings. A tray ceiling gives two places for crown: the perimeter and the step. Running it on the step (or with a cove light behind it) makes the tray read as deliberate rather than as a framing leftover.
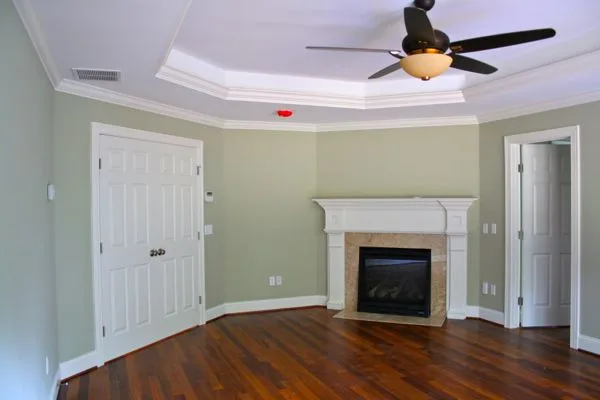
Photograph. Crown outlining a tray ceiling. Project: Master Bedroom by Al Martin on Behance.
With wainscoting below. Crown at the top and a wainscot at the bottom frame the wall between them; it is the oldest combination in interior trim. Our wainscoting guide covers how high to run the lower band.
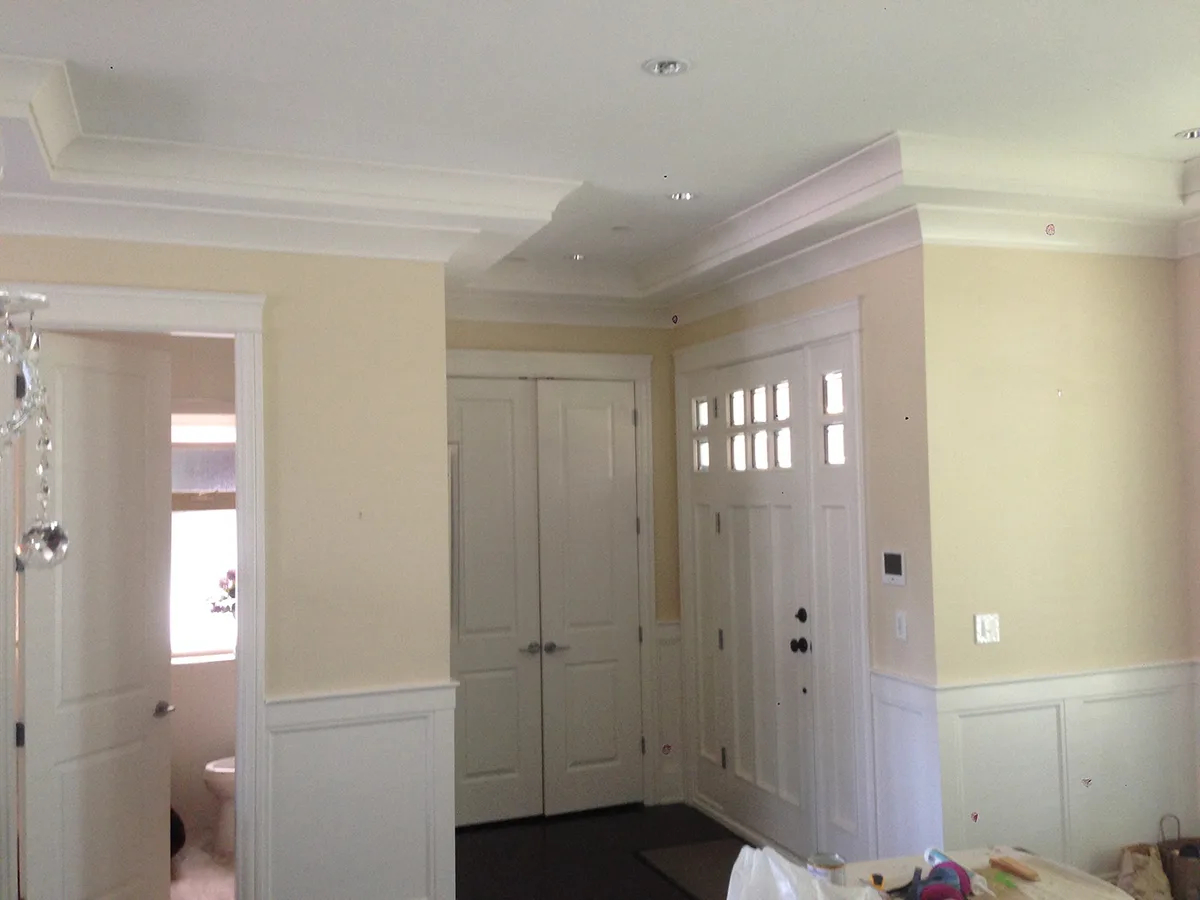
Photograph. Crown above, wainscot below, in a finished entry. Project: Private Residence Crown moulding install by Justin Aydein on Behance.
On vaulted and sloped ceilings. Crown on a sloping ceiling needs different angles where it changes plane, which is why many installers stop it at the flat part of the room or run a flat frieze board instead. The photo below shows the second approach handled well: a deep built-up crown at the top of the flat walls and the vault left clean. Our guide to sloped ceilings and attic rooms covers the rest of the room.
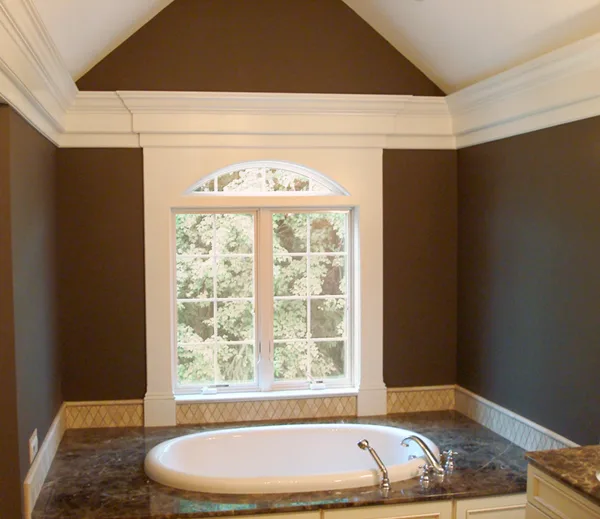
Photograph. Built-up crown under a vault. Project: Bathroom Window by Al Martin on Behance.
In panelled period rooms. In a fully panelled room, the cornice is part of the same system as the panels and the doorcases, and is the reason the room feels finished.
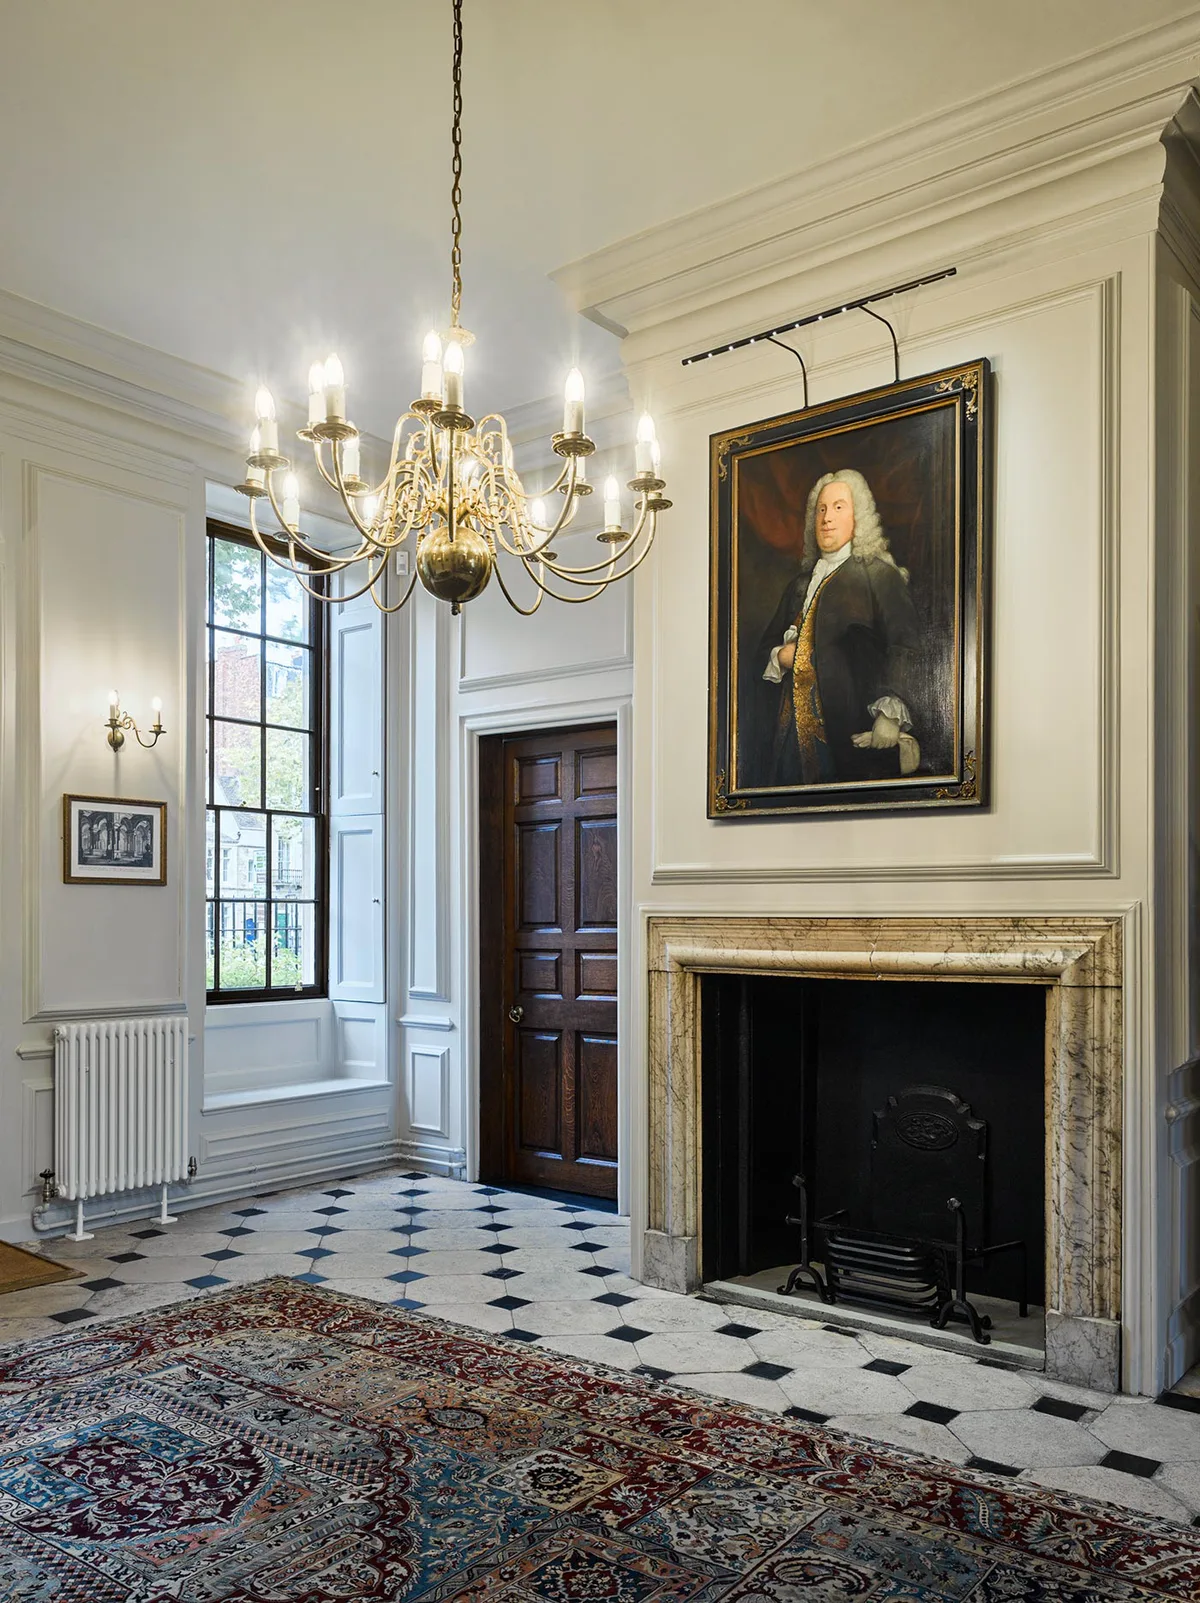
Photograph. Panelling and cornice in a historic interior. Project: St Giles House, St John’s College Oxford by Lance McNulty on Behance.
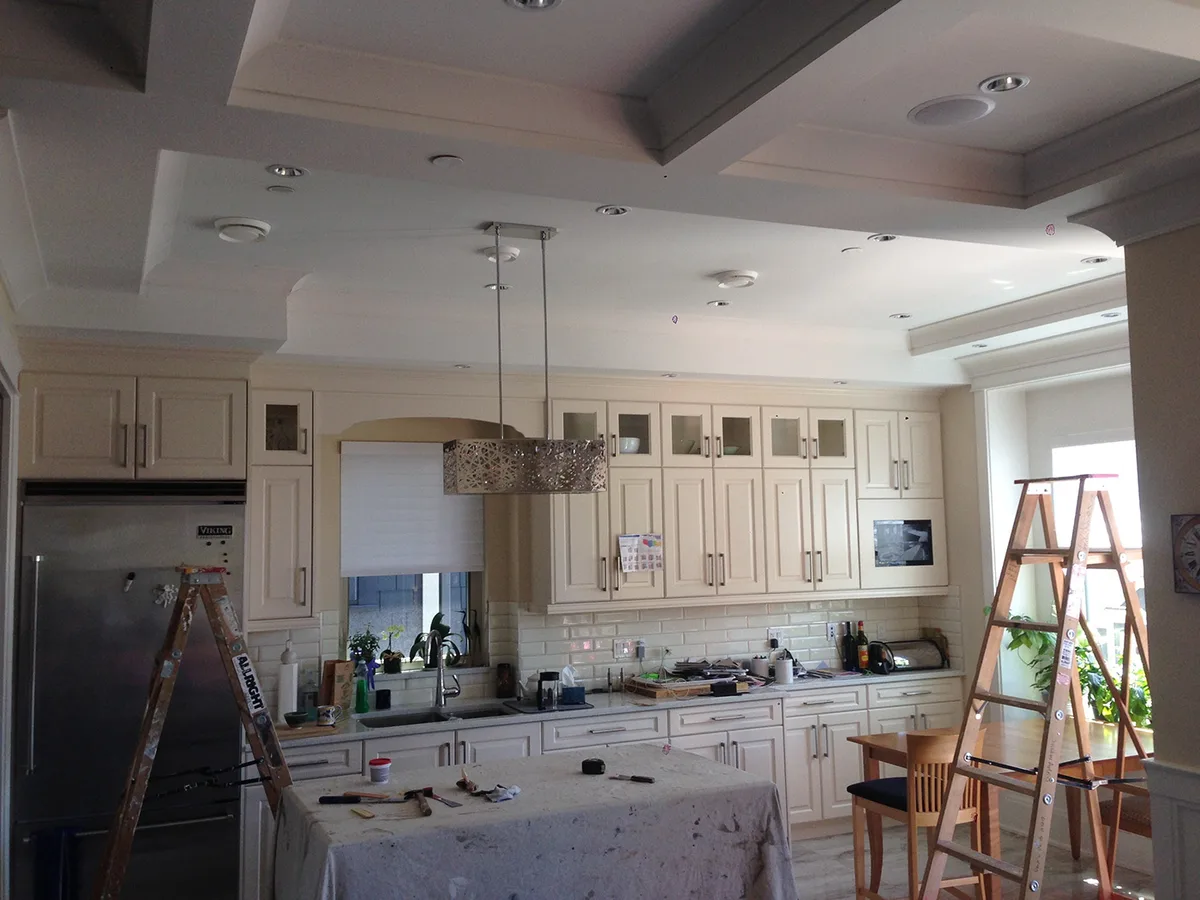
Photograph. Mid-install: crown being run round beams and cabinets. Project: Private Residence Crown moulding install by Justin Aydein on Behance.
DIY or hire a carpenter?
Angi puts the job at $4 to $23 per linear foot installed and says labor is usually half the cost or more, so on its $1,303 average job, doing it yourself saves roughly $650 or more, minus any tools you have to buy. Our view, not a measurement: crown is the hardest common trim to do well yourself, because it combines compound angles, walls that are not square, and work overhead. If you try it, practice the corners on offcuts first, cope the inside corners, and use polyurethane or foam if you want to avoid the heaviest cuts. If the house has trusses and you see seasonal cracks at the ceiling, pay for the JLC detail above or accept that the gap will come back.
If you are deciding on paint, our guide to AI paint color visualizers covers what a render can and cannot tell you about a color, which applies to trim as much as walls.
Seeing it in your room first
Crown is one of the few things that is hard to imagine on your own ceiling. Two inexpensive tests: tape paper strips of the right drop along the top of the wall for a day, and try it on a photo. AI room design tools, including MeltFlex AI, can add crown molding to a photo of the actual room so you can compare a slim cove with a deep built-up cornice. Treat the render as a check on proportion, not on measurements; it does not know your ceiling height.
Frequently asked questions
What is crown molding?
Crown molding is decorative trim installed where an interior wall meets the ceiling, and sometimes over doors, windows and cabinets. It covers the wall to ceiling joint and gives the room a finished top edge. It descends from the cornice of classical architecture and is made of wood, MDF, polyurethane, PVC, foam or plaster.
What size crown molding should I use?
Angi's 2026 guide suggests a face width of 2 1/2 to 6 inches for 8 foot ceilings, 3 to 7 1/2 inches for 9 foot ceilings and 4 to 9 inches or more for 10 foot ceilings, with larger sizes in formal or large rooms. A simple start is 2 1/2 inches for an 8 foot ceiling plus about an inch per extra foot. Remember the size on the label is the face width; the part you see on the wall, the drop, is smaller.
What angle do you cut crown molding?
It depends on the spring angle of the crown and the angle of the corner. For a square 90 degree corner, cut 38 degree (52/38) crown lying flat at a 31.6 degree miter and 33.9 degree bevel, and 45 degree crown at a 35.3 degree miter and 30 degree bevel. Alternatively, stand the crown upside down against the fence at its spring angle and cut a plain 45 degree miter. Inside corners are best coped rather than mitered.
What is the spring angle of crown molding?
The spring angle is the angle at which crown leans out from the wall. Most stock crown is either 45 degree or 38 degree; 38 degree crown is often labelled 52/38, because its back makes 52 degrees with the ceiling and 38 degrees with the wall. You need to know it before cutting, because the miter and bevel settings are different for each.
How much does crown molding cost?
Angi's 2026 data from 1,425 projects puts professionally installed crown molding at $1,303 on average, with most jobs between $609 and $2,126, or $4 to $23 per linear foot. Material alone ranges from $1 to $4 per foot for PVC or foam and $1 to $7 for MDF to $3 to $30 for solid wood.
Why does my crown molding have a gap at the ceiling in winter?
In houses framed with roof trusses, the trusses can lift the ceiling off interior walls in winter, a movement called truss uplift. Crown nailed to both wall and ceiling then cracks or opens a gap. The fix described in the Journal of Light Construction is to fasten the crown to the ceiling only, on a triangular nailing base, with two overlapping flat trim boards on the wall that can slide past each other.
Should crown molding be painted the same color as the ceiling or the walls?
Most often it is painted the trim color, matching the door and window casings, which frames the room. Painting it the ceiling color makes the ceiling look larger; painting it the wall color makes it quieter and suits modern rooms. Whichever you choose, keep it consistent with the other trim in the same room.
Sources and how this was made
- Angi, Crown Molding Sizes and Dimensions, updated 9 July 2026, for sizes by ceiling height, room formality, stock lengths and the 15 to 20% waste allowance. We have pointed out two inconsistencies on that page above.
- Angi, How Much Does It Cost to Install Crown Molding?, updated 1 September 2026, for the average, ranges, per-foot prices by ceiling height and by material, painting and plaster restoration costs.
- Chuck Green, Crown Detail Hides Truss Movement, Journal of Light Construction, 1 September 2000, for the truss uplift detail.
- Wikipedia, Crown molding, last edited 13 May 2026, for the definition, spring angle formats, coping, corner blocks and the miter and bevel formulas. The article carries a “needs more citations” notice, so we used it for definitions and the standard formulas only.
- The drop and projection table and the angle table are our own calculations from those formulas; the 90° results match the crown detents on compound miter saws. The three drawings are by MeltFlex. The opinions marked as ours (sizing, DIY) are judgement, not measured data.
- Search volumes are Ahrefs US estimates, read 9 November 2026.
- Every photograph and render is a carpenter’s, photographer’s or studio’s project on Behance, credited and linked in its caption; the copyright stays with them, and each caption says whether it is a photograph or a 3D render. We did not install crown for this article.
Disclosure: MeltFlex s.r.o., which publishes this blog, makes MeltFlex AI, shown in the sidebar. No molding brand, retailer or contractor paid to be mentioned.
Planning interiors for clients and want the visuals or the drawings done for you? Book a free call.
More articles
Share article